

Content Providers' Guide
LiLa Portal - Guide for Content Providers
Within the LiLa framework, content providers are responsible for creating experiments as ‘LiLa Learning Objects’, uploading them to the portal and allocating time slots for lecturers or groups of lecturers.
Creating Experiments
The LiLa portal handles information about experiments in the form of SCORM objects. SCORM is a prominent eLearning standard which most Learning Management Systems support. While the full SCORM documentation is available for download, this document is very large and LiLa only needs a very minor subset of all the SCORM machinery. This known as a LiLa Learning Object. Please don't be afraid - creating a LLO (LiLa Learning Object) is not very hard.
You need to prepare the following:
- Create a HTML page that provides direct, uncontrolled access to your experiment. Don't worry about booking or reserving experiments, or controlling access to experiments, LiLa will handle this transparently for you. Typically, such a HTML page will contain an "applet" tag that renders the user interface of your experiment.
An example of a HTML page is provided for download - you may use it as a template for your own experiments. Needless to say, this is not limited to Java applets as in the example, but everything that is a valid HTML page and would run in a browser would do.
Of course, you would need to edit this file to fit your needs.
- Create a file named "imsmanifest.xml". This XML file describes the content of the SCORM object. It may already contain metadata classifying its content, but at this moment you may leave this file mostly blank. Additional metadata, as required for searching and locating experiments, are added by the LiLa portal later anyhow, so don't bother at this time.
An example of an imsmanifest.xml file is also available for download.
This file needs to be edited as follows:
- The elements organizations default and organization identifier should match the name of your institution. This information is, strictly speaking, not required by the portal and not used within LiLa, though SCORM requires it.
- The element Title should be edited to match the name of your experiment. Note that the title appears twice; once as the title of the complete SCO, and once as an element within the SCO. LiLa does not distinguish between these levels, and both titles should be identical.
- The item element with the identifier "item1" refers to a resource named applet which is defined further below in the text. This element can stay as it is.
- In the resources section, the actual html page you created in step 1 is referenced. This happens in the line <file href="applet.html"/>. Edit this line to match the filename of your html code.
This is already all of the complicated part. The easy part is now to download a couple of additional files you must include unaltered.
- adlcp_rootv1p2.xsd, please download and keep as it is.
- imscp_rootv1p1p2.xsd, a second file that should remain as is.
- imsmd_rootv1p2p1.xsd, a third XML file you should simply use as it is and you do not need to modify.
- ims_xml.xsd, the last file needed.
All six files should now be in a single directory on your computer system. To create a LLO from them, simply pack them with the ZIP archiver. Make sure all files are in the ZIP toplevel, i.e. do not add the directory where the files are located to the ZIP, but add the files themselves. For those of you that use Linux, the following command line will do:
zip a llo.zip *
Congratulations, you just created your first LLO! This is really all you need to know.
Uploading Experiments
The next step after creating experiments is to upload them into the LiLa portal so other users - typically lecturers - can find them.
Logging into the LiLa portal
- Direct your browser to the Library of Labs home page
- Click on the sign-in button to the top right of the page:
![]()
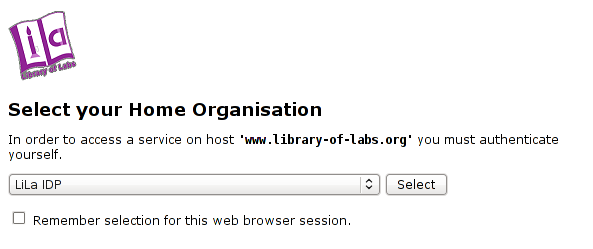
- You are now redirected to the "where are you from" page. LiLa is based on the Shibboleth federated identity provider system, and as such, requires you to select your identity provider. If your identity provider is not already available for selection there, please select "LiLa IDP", and contact your LiLa representative to create an account on our system - or to add your identity provider to the list.
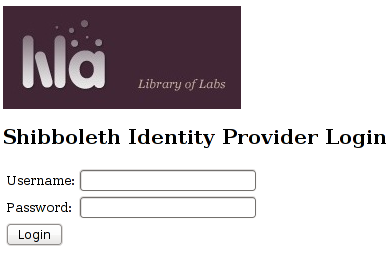
- Log in using your name and password.
- To add new material to LiLa, click on the contribute button:
![]()
This button is in the middle top of the page. On this page, locate the "Upload llo file" button near the bottom of the page, and the "RIG" button on top of the page on the bar that includes "Learning Objects", "Lessons" and "Reservations".
Rig Creation
The next steps depend somewhat on whether you are creating a virtual experiment requiring no further hardware resources, or a remote experiment that runs on a physical Rig in your lab. In the latter case, additional information on the rig is required.
The reason why the rig information is needed is that Rigs themselves are booked, rather than the experiments. If a lecturer or student books a experiment in a particular time slot, the specified rig is required to perform this experiment within this time slot, meaning that no other experiments using the same rig can be run simultaneously. A rig, as a hardware resource is different to an LLO, which is a software resource only.
- If you need to create a rig, locate the "RIGS" button in the middle of the page and press on it. You then get a form that allows you to enter the rig information: Note that you only need to do this once per rig, not once per LLO.
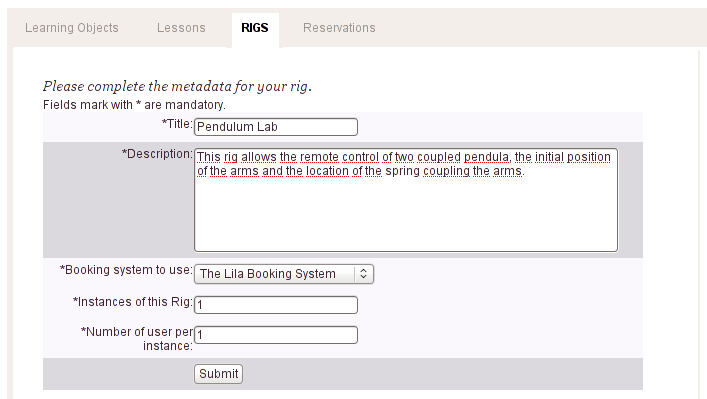
- Enter sensible information on the rig name and a short description of the hardware, allowing you - and potentially other users - to create experiments (i.e. LLOs) running on this hardware.
- Rigs, as they are hardware resources, can only be run by a limited number of users at a time - typically one user per instance. This information goes below the description of the rig.
- The booking system defines the software component by which this rig can be reserved by users. Unless you want to implement your own, select "The LiLa Booking System". This is the best choice in most cases, and all other selections are left to experienced users and specialized applications. Don't bother at this time.
- Instances of this Rig describes how many identical copies you have of the same hardware, which can be scheduled in parallel. Typically, you only have one instance, so enter a "1" here.
- Number of Users per Instance describes how many users can run and view the identical rig at the same time. Most of the time, a rig can only be used by one student, so enter a "1" here. If you created the LLO in such a way that several students can run the rig, and you want to foster group work and collaboration between students, enter the maximum group size here. This information is also required for booking.
- Click on Submit. This will create your rig, and make it available for use in LiLa.
Uploading of the SCORM Object - LiLa Learning Object (LLO)
The following steps provide the software component that interfaces to the rig - that is, they allow you to upload the ZIP file containing the SCORM objects created in the first step. This makes the browser interface you compiled before available to the portal, and thus to other users.
- On the Upload page, locate the "Upload LLO file" mask:
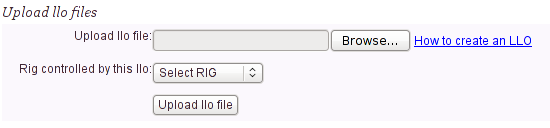
- Here you need to provide two pieces of information:
- The name of the LLO, that is, the SCORM object you created in the first step. This file is responsible for rendering your experiment in the browser, and making it accessible to lecturers and students.
- The name of the rig, i.e. the name of the hardware resource - if any - that the experiment runs on. If a single hardware resource is capable of running several experiments, make sure that the same rig name is used for all of the experiments.
- If your experiment is a virtual experiment only, and does not require a physical hardware resource to run on, select "No Rig Required".
- Alternatively, if you want to use your own booking mechanism, and the LLO you created is capable of reaching this booking mechanism and rendering it for the user in the browser, select "No Rig Required" as LiLa is not concerned with booking in this case.
- Finally, click on the "upload" button to send the ZIP file to the LiLa portal.
The next step requires you to provide metadata; that is, title, description, contact and license information. This information is collected to make your experiment searchable in the LiLa database, and to make it possible for prospective users to contact you. The information should be entered using the following form:
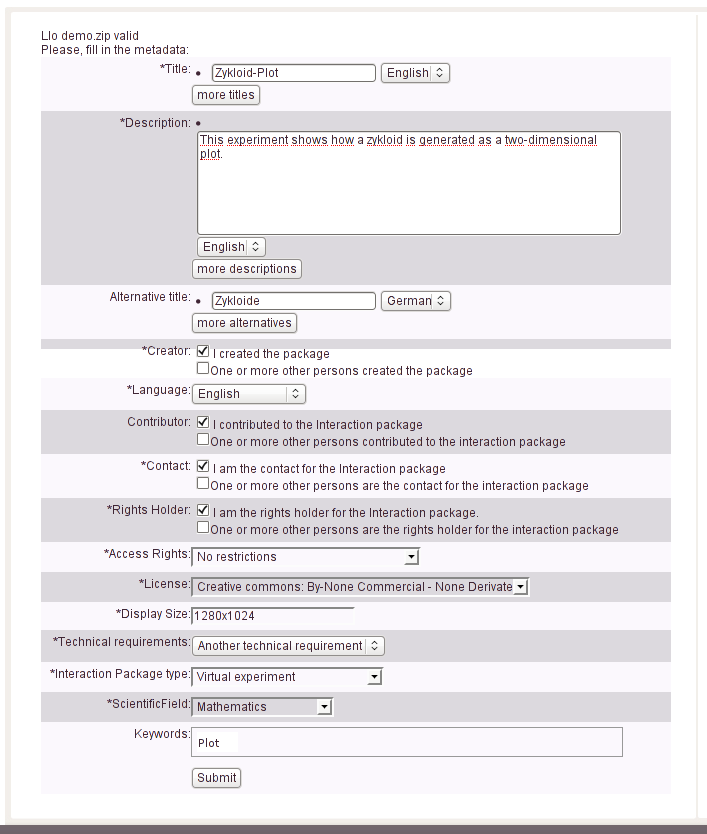
- While this form looks long and complicated, most information is already set to suitable defaults and is self-evident, so please don't be afraid by the many fields you see here.
- Title is a one-line title describing the experiment. On the LiLa portal, it will be visible under this title in the list of all available experiments, or in the 'search results' mask.
- More titles in additional languages can be added any time. At this stage, we should just use one title.
- Description is a short abstract on the contents of the experiment, i.e. what it is about.
- Again, translations of the description in more languages are always possible. At this time, don't add more descriptions.
- Alternative Title is a second title under which the experiment can also be found. Just leave this alone at this time.
- Creator addresses the person that created the experiment, typically you. If you are uploading the experiment for someone else, please provide contact information such as the name and the email address of the real creator.
- Contributor means one or several persons that helped to create the experiment; for example, any assistants that helped to build the rig, programmers that developed the software interface, or any additional persons involved in one way or another. By default, you are the only contributor to the experiment, and thus leave the check-mark where it is.
- Contact is a contact point to talk to in case something goes wrong with the experiment and it requires maintenence; it is also the contact point for negotiating time on a physical rig. By default, this is also you.
- Access Rights defines the rights under which this experiment can be used. No Restrictions is the most permissive right under which your experiments are available anytime to anyone, and also the default. Requires registration means that a formal registration procedure with the contact point (see above) must be established to be able to use the hardware. Requires agreement with rights holder means that the rights holder must be contacted before using the experiment; the contact to the rights holder or mediator is not established through the LiLa portal automatically and must be handled off-line, by email or phone.
- License defines the rights you grant other users when re-using the content, i.e. the Learning Object you created. Currently, LiLa only offers one possible license, namely the Creative Commons License. LiLa advocates a version of this license which restricts usage of your works to non-commercial applications, and which forbids to derive further work from it. Additional licenses may be added to LiLa any time later.
- Display Size specifies the amount of screen space required by your experiment in the browser. It is specified as pixel width x pixel height. Typical sizes are "800x600" or "1024x768". This element is used to optimize rendering on the screen.
- Technical requirements define additional software that need to be installed at the student side to be able to run and access your hardware. By default, only a browser is assumed to be necessary. If not, please provide a short one-line title of the requirement, for example "java-vm" for java components, a short abstract describing the requirements in more detail, say "java plug-in version 1.5 or better", and a URL where the necessary software component can be downloaded, for example "www.java.com/download". This information is provided here for the convenience of your users.
The remaining elements define the type, scientific field of the experiment, and keywords; these elements are used to locate your experiment more easily and to facilitate the searching functionality of the portal. This information does not change the functionality of the portal, nor does it in any way impact the booking or downloading process. Its sole purpose is to identify experiments more easily.
- Interaction package type specifies whether this is a virtual or a remote experiment. Virtual experiments are computer simulations or computer algorithms that do not measure true physical quantities. Remote experiments run on a true hardware rig and interact with nature directly.
- Scientific field specifies the field the experiment can be classified under, e.g. "Mathematics" or "Physics" are such fields selectable here. Again, this information is only collected to ease the location of experiments.
- Keywords are a set of user-defined, free-form keywords you would describe the experiment with. The search form allows you to locate experiments by such keywords.
Testing and Publication
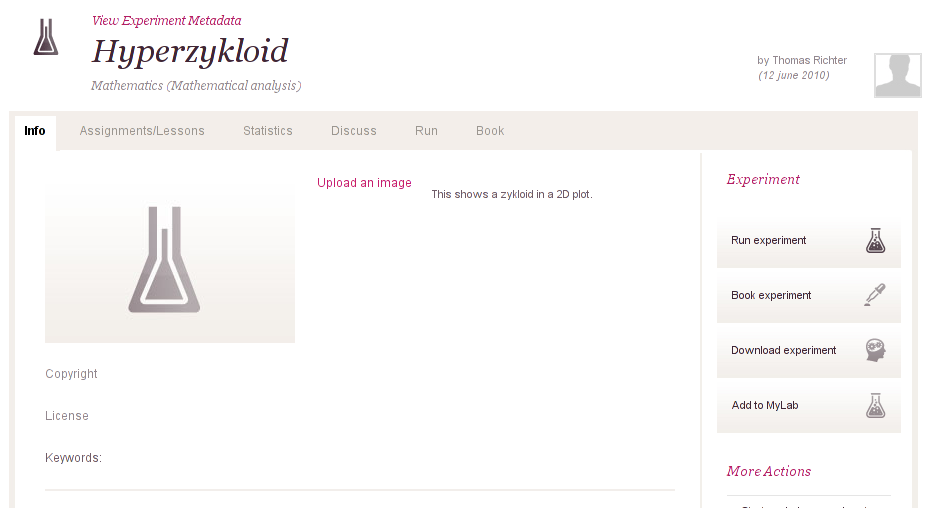
Even though the LLO, that is the software to render the experiment, is now uploaded to the portal, the experiment is not yet publicly available. The two final steps before anyone can access the content are testing and publication. To complete these, follow the link that appears after pressing Submit on the previous form.
- It is absolutely essential that you test your experiment before students or lecturers try to use it as first attempts often do not work as intended. To do this, on the Experiments Overview page click on Run Experiments on the right hand side of the page:
This will now show the HTML page you created in the very first step, and will allow you to test your creation carefully. It is shown here exactly as it would appear when embedded in the learning management system later on:
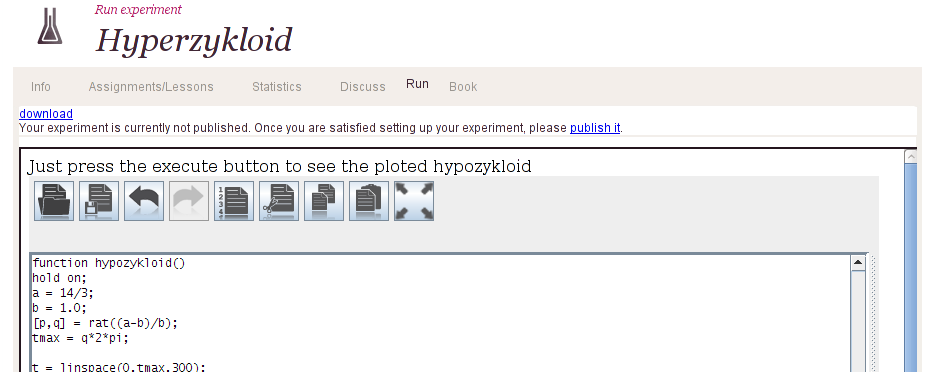
- When you are finished with testing it, it is time to publish the experiment by pressing on the blue "publish it" button on the top of the page. It can later be withdrawn from the same page if you need to make any adjustments or modifications.
Managing Reservations
Remote experiments, unlike virtual experiments, are resources that cannot be used by an arbitrary number of students at a given time, and thus require reservation. Or, to be more precise, it is not the experiment or LLO that requires reservation, but rather the Rig that it runs on. To this end, the content provider splits off all available time on the rig into time slots, and allocates the available time slots to the lecturers or institutions who are using it. How such institutions use these time slots is up to them - for example, a time slot reserved for one institution could again be broken up into two smaller slots for two classes at the said institution. However, this is the responsibility of the lecturer and not of the content provider. Typically, you as the content creator, will be contacted by lecturers and institutions to create reservation slots for them. Hence, don't worry at this time, and proceed directly to the creation of the reservation time slots:
For this, navigate back to the entry page of the LiLa portal, click on Contribute and select the Reservations tabulator bar. The following screen will open:
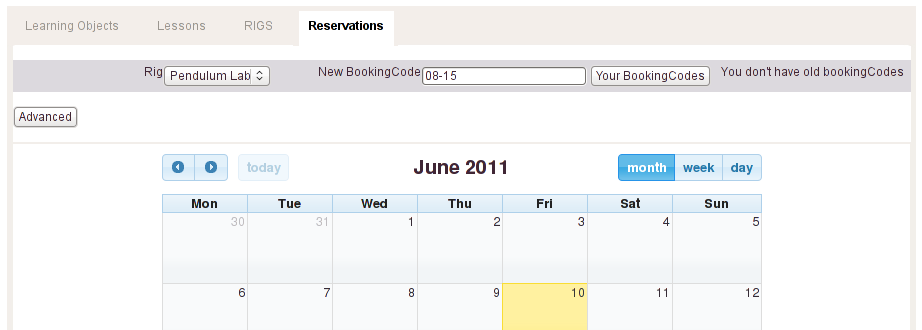
- On the top left, select the rig for which you would like to manage reservations. Note that reservations are associated with the rigs the experiments run on, not to the experiments themselves. In this case, we selected the Pendulum Lab.
- In case you haven't handed out any booking codes yet, enter a new booking code in the field to the right of the rig selection. The booking code is whatever you choose it to be, as long as it is unique. You probably want to pick the name of the institution or lecturer the reservation applies to. This booking code then needs to be communicated back to the lecturer to allow her or him to grant access to the booking. Here, the code "08-15" has been typed in.
- In the calendar tool below, select the time range at which the rig should be reserved. At this stage, it is still not available for anyone else.
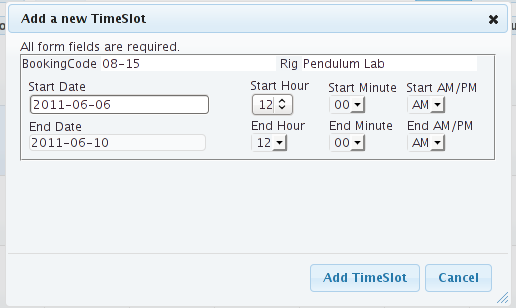
- This secondary reservation window allows you to refine the selection by specifying the time of the day, i.e. the hours at which the booking code is valid. Hence, experiments can also be shared on an hourly basis.
- Click on Add Reservation near the bottom of the page to make the booking code valid.
- Reservations can also be cancelled again by Cancel Reservation on the same page.
- Finally, don't forget to communicate the booking code you selected to the lecturer or institution that wanted to make a reservation in first place. The rig, and all experiments depending on it, are now available for them.